Easy Granny Square Christmas Baubles: Free Pattern
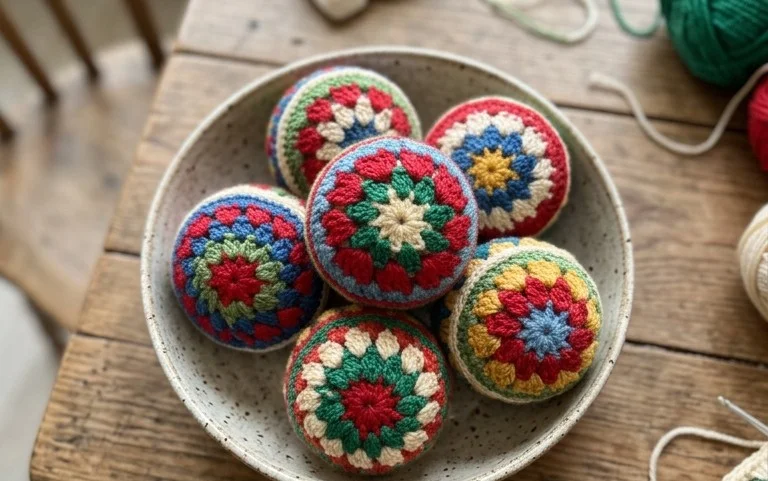
These hanging ornaments transform simple squares into soft, geometric spheres that catch the light on a tree branch. You build these baubles by folding a standard crocheted square into a cube shape, creating a nostalgic look that feels handmade and cozy. This project suits beginners who want to practice joining techniques and experienced makers who need a quick holiday gift. The structure relies on basic clusters, ensuring you finish each one in under an hour. You will learn how to fold the fabric to create a three-dimensional form without needing complicated increases or complex shaping, making your holiday decorating uniquely satisfying.
Why You’ll Love This Pattern
The Classic Crochet Granny Square is the quintessential project for building fundamental skills while creating a versatile building block for larger items. You work in joined rounds, which keeps the square edges sharp and prevents the spiral distortion often found in circular amigurumi projects. Because each round is completed independently, you can easily incorporate scraps of leftover yarn to create a high-contrast look or keep the color scheme consistent for a modern, minimalist aesthetic. This pattern is exceptionally portable, allowing you to hook a few rounds during a commute or while watching a show, making it a reliable staple for any crocheter’s library.
I finally mastered the chain-three turning space thanks to the clear instructions in this guide, and my squares are no longer curling at the edges.
— Sarah, hobbyist maker
Pattern Overview & Skill Level
- Skill Level: Beginner
- Approximate Time: 30 to 45 minutes per square
- Construction: Joined rounds worked from the center outward
- Finished Dimensions: Approximately 5 inches by 5 inches using medium weight yarn
Materials & Supplies Needed
- Yarn: Worsted weight (#4) acrylic or cotton blend, approximately 20 yards per square.
- Hook Size: 5.0 mm (US H-8).
- Notions: Tapestry needle for weaving in ends, sharp scissors.
- Yarn Substitutions: You can use DK weight yarn with a 4.0 mm hook for a smaller, tighter square, or bulky weight yarn with a 6.0 mm hook for a faster, larger result. Be aware that changing yarn weight will significantly alter the final dimensions.
Stitch Guide & Abbreviations (US Terms)
- ch = chain
- sl st = slip stitch
- dc = double crochet
- dc cluster = a group of 3 double crochet stitches worked into the same space
- sp = space
- st/sts = stitch/stitches
Step-by-Step Pattern Instructions
Center and Round 1
- Foundation: Ch 4, join with a sl st to the first chain to form a ring.
- Rnd 1: Ch 3 (counts as first dc), work 2 dc into the ring. Ch 2, *3 dc into ring, ch 2; repeat from * twice more. Join with a sl st to the top of the initial ch-3. (12 dc, 4 ch-2 spaces)
Working the Rounds
- Rnd 2: Sl st into the next dc and into the first ch-2 corner space. Ch 3, (2 dc, ch 2, 3 dc) into the same corner space. *Ch 1, (3 dc, ch 2, 3 dc) into the next corner space; repeat from * twice more. Ch 1, join with a sl st to the top of the initial ch-3. (24 dc, 4 ch-2 corners, 4 ch-1 spaces)
- Rnd 3: Sl st into the next dc and into the first ch-2 corner space. Ch 3, (2 dc, ch 2, 3 dc) into the same corner space. *Ch 1, 3 dc into the next ch-1 side space, ch 1, (3 dc, ch 2, 3 dc) into the corner space; repeat from * twice more. Ch 1, 3 dc into the last ch-1 side space, ch 1, join with a sl st to the top of the initial ch-3. (36 dc, 4 ch-2 corners, 8 ch-1 spaces)
Finishing
Fasten off, leaving a 6-inch tail. Use a tapestry needle to weave the tail through the back loops of the final round to secure it. If you plan to join multiple squares, leave a longer tail on the final round to use for seaming.
Care & Washing Instructions
- Hand wash in cool water with a gentle wool or acrylic wash to prevent fiber damage.
- Lay flat on a clean towel and reshape to the original square dimensions while damp.
- Avoid wringing or twisting the fabric, as this can stretch the stitches and distort the square shape.
Pro Tips & Common Mistakes to Avoid
Maintain consistent tension by ensuring your yarn feed is smooth and you are not pulling the yarn too tightly during the ch-1 spaces. Always place a stitch marker in the first chain of the starting ch-3 of each round to easily identify where to join your slip stitch at the end. Weave your ends in diagonally across the back of the stitches rather than straight across; this prevents the yarn from pulling out over time with regular use. If you find your square is not laying flat, try going up a hook size to reduce the tension that causes cupping.
Frequently Asked Questions
Can I use a magic ring instead of a starting chain?
Yes, you can substitute the starting ch-4 ring with a magic ring to create a tighter center hole. Simply work your Round 1 stitches into the ring and pull the tail firmly to close the gap.
How do I adjust the size of the square?
You can make the square larger by simply repeating the instructions for Round 3. In every subsequent round, you will have more ch-1 spaces along the sides to work your dc clusters into.
Is this pattern suitable for complete beginners?
This pattern is highly recommended for beginners because it focuses on the double crochet stitch and introduces the concept of working into chain spaces rather than individual stitch loops.
Can I sell the items I make from this pattern?
Check the designer’s specific terms for commercial use. Generally, small-batch sales of finished handmade items are permitted, but mass production or redistribution of the pattern text is not allowed.
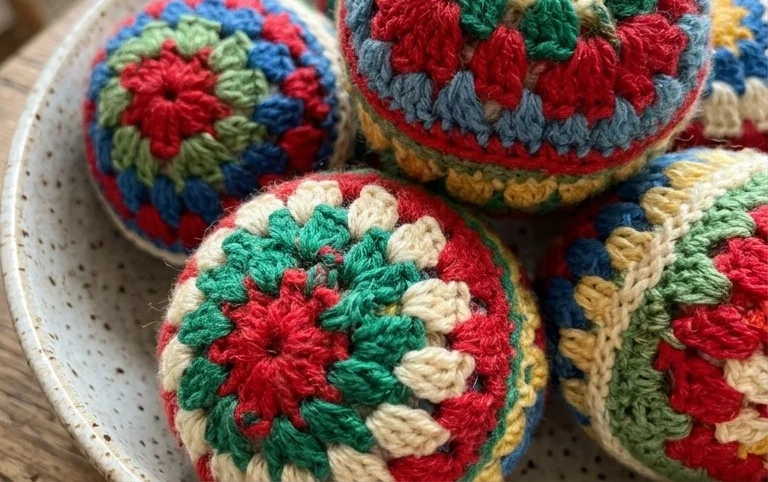
Your finished ornament brings a soft, tactile charm to your tree that store-bought plastic spheres cannot match. You can adjust the size by using cotton thread for smaller gift tags or chunky yarn for larger statement pieces to hang in a window. Share a photo of your creations on social media so others can see how your color choices turned out. Browse the rest of the blog for more seasonal projects to keep your hooks moving through the winter months. Have fun creating your collection.